Elastic IP #
Elastic IP addresses are static IPv4 addresses provided by AWS that can be associated with your EC2 instances. They are designed to provide a consistent, publicly routable IP address for your instances, which can be particularly useful when running web applications, services with persistent connections, or any application that requires a stable IP address.
Why Use Elastic IP Addresses? #
There are several reasons why you might want to use an Elastic IP address:
Persistent IP address: When you stop and start an EC2 instance, its public IP address may change. This can cause problems if you need a consistent IP address for your applications. Elastic IP addresses remain associated with your instance even when it is stopped and started, ensuring a consistent public IP address.
Failover and High Availability: If you have multiple instances running in different availability zones for redundancy or load balancing, you can quickly reassociate an Elastic IP address from a failed instance to a healthy one, minimizing downtime.
DNS Management: Using an Elastic IP address makes it easier to manage DNS records, as you can associate a domain name with a stable IP address rather than having to update DNS records each time the instance’s public IP address changes.
Allocating an Elastic IP Address #
To allocate an Elastic IP address, follow these steps:
- In the AWS Management Console, search for “EC2” in the search bar or find it under the “Services” menu.
- Click on “EC2” to open the EC2 Dashboard.
- In the left sidebar, click on “Elastic IPs” under the “Network & Security” section.
- Click the “Allocate new address” button.
- In the “Allocate new address” dialog, select “Amazon’s pool of IPv4 addresses” and click “Allocate.”
- A new Elastic IP address will be allocated to your account.
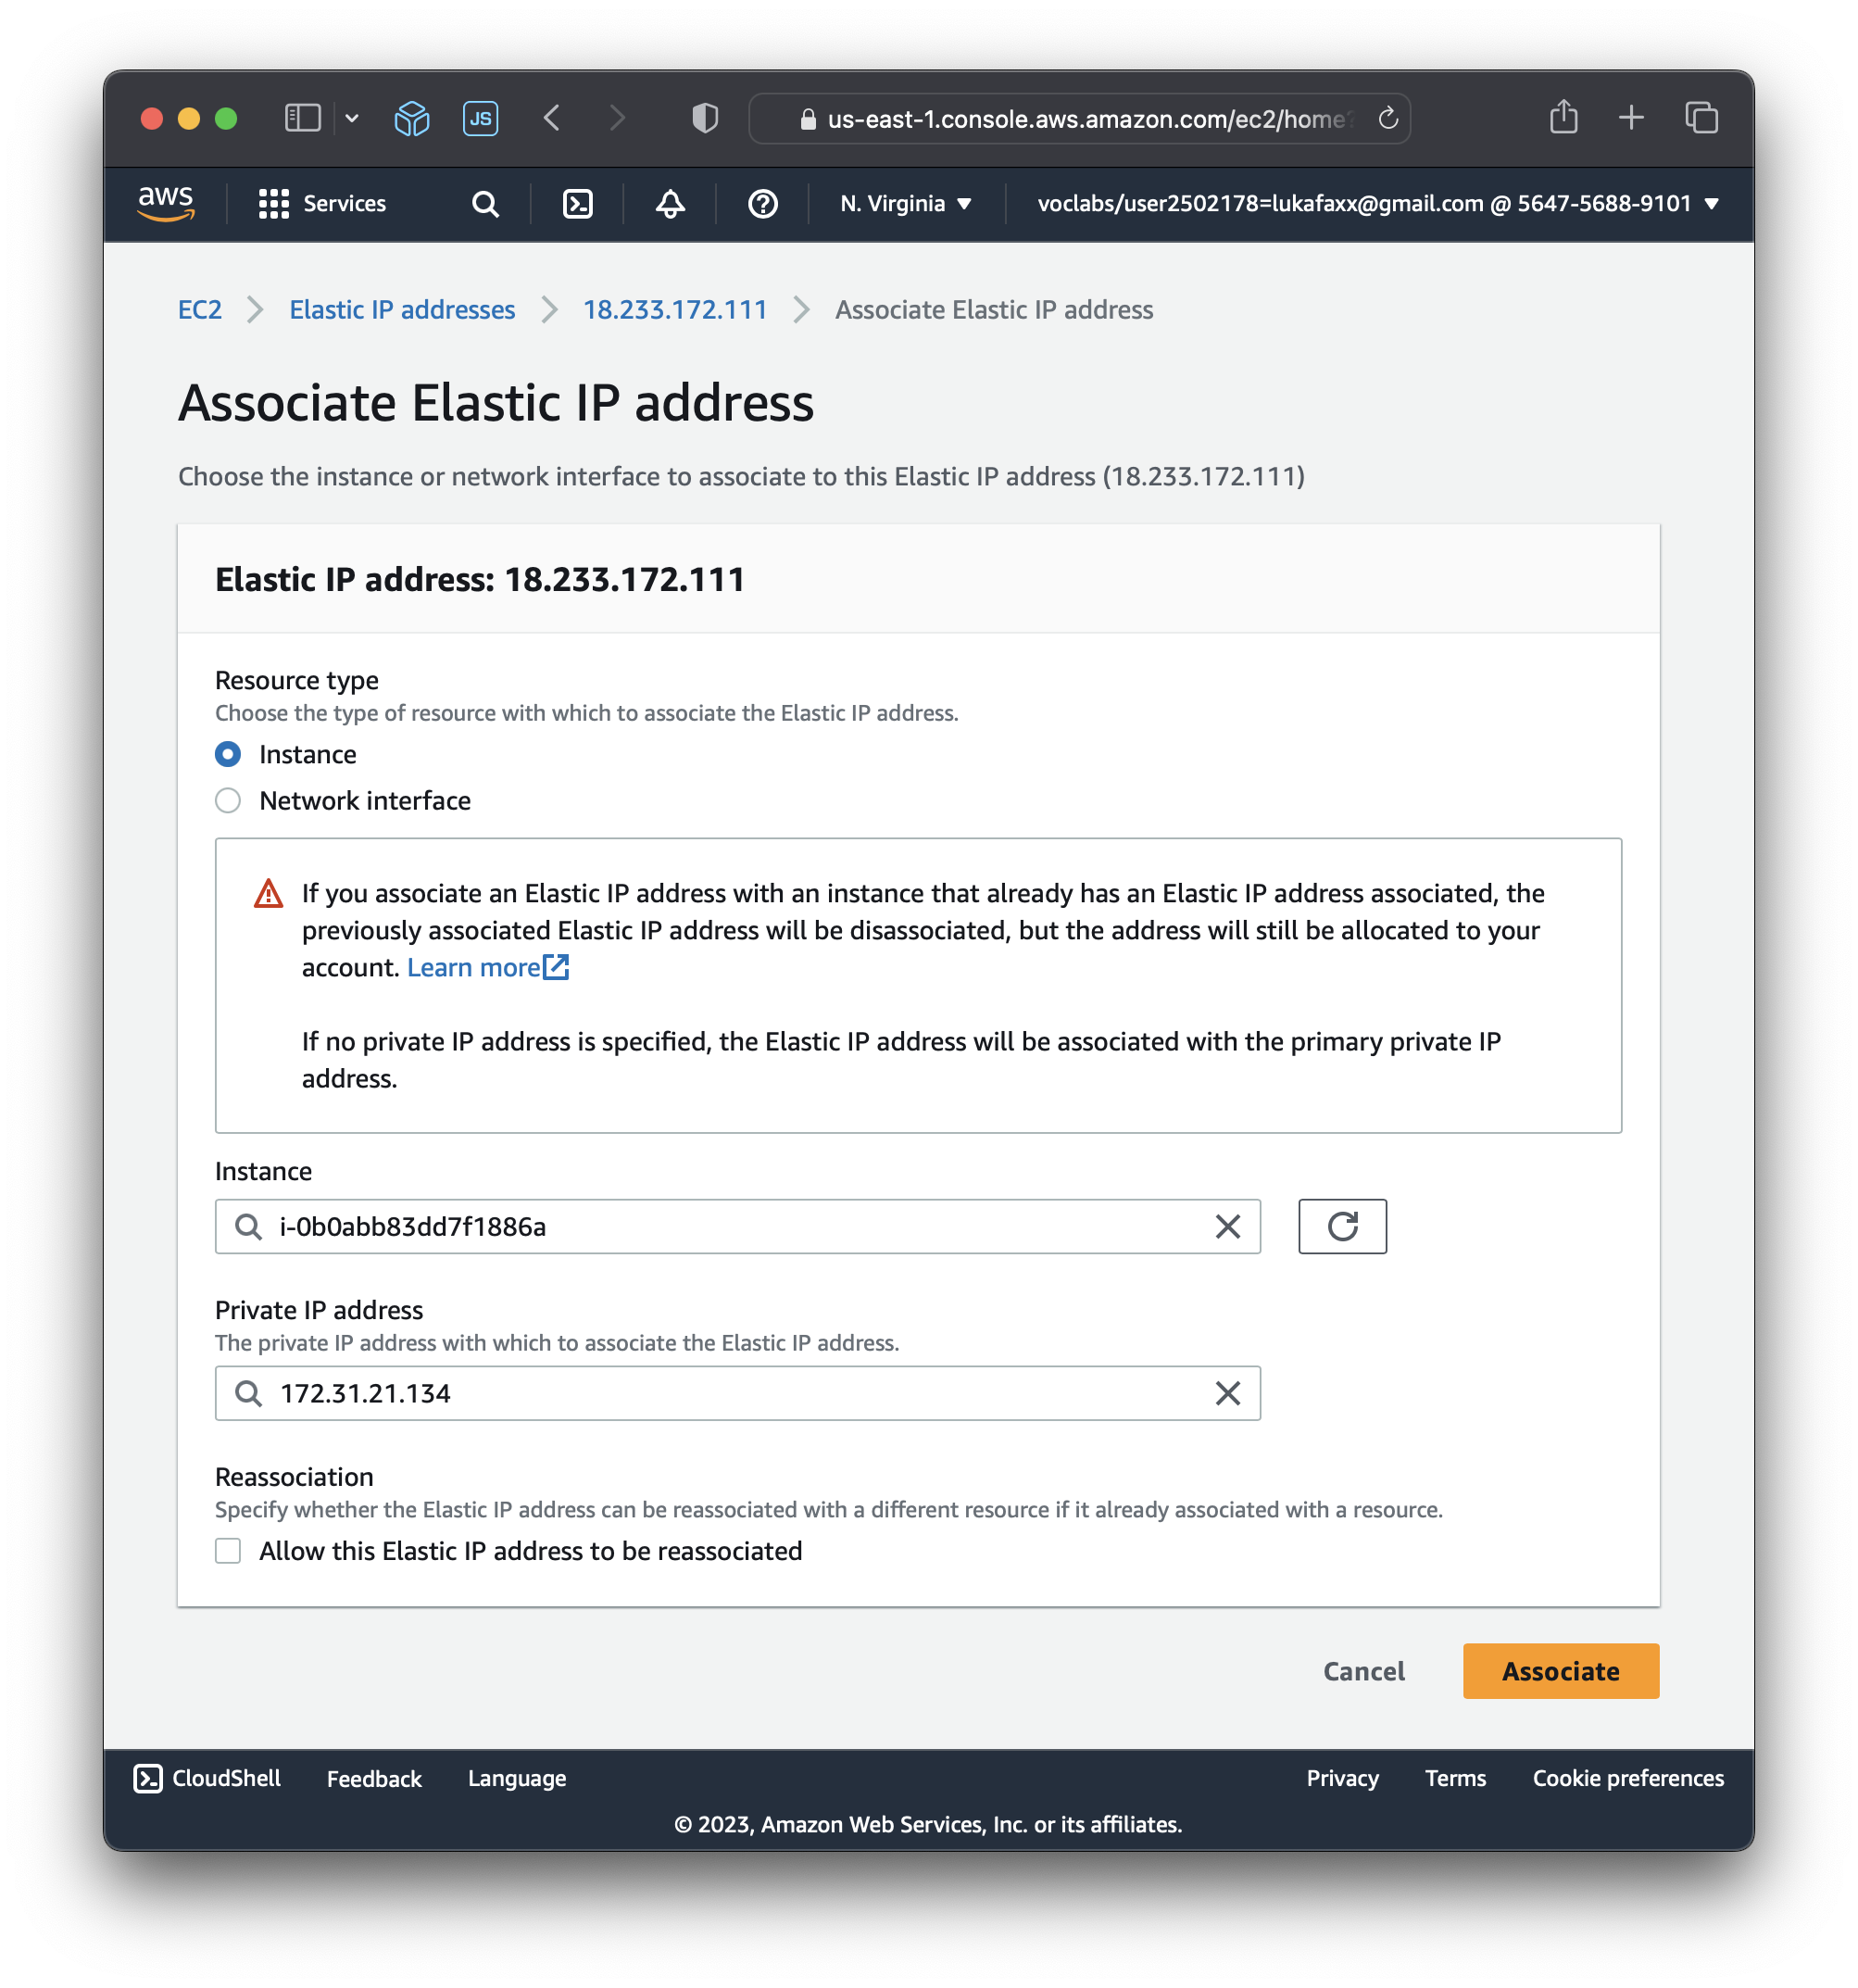
Associating an Elastic IP Address with an Instance #
To associate your newly allocated Elastic IP address with an EC2 instance, follow these steps:
- In the “Elastic IPs” page, select the Elastic IP address you want to associate with an instance.
- Click the “Actions” button and choose “Associate Elastic IP address.”
- In the Instance field, select the instance you want to associate the Elastic IP address with.
- In the Private IP address field, you can also choose a private IP address for the instance if it has more than one.
- Click the “Associate” button.
Your Elastic IP address is now associated with the selected EC2 instance. This association may take a few moments to take effect. Note that any existing public IP address associated with the instance will be released when you associate an Elastic IP address.
Remember that AWS charges for Elastic IP addresses if they are not associated with a running instance or if they are associated with a stopped instance. To avoid unnecessary charges, release unused Elastic IP addresses by selecting them in the “Elastic IPs” page and clicking “Actions” > “Release Elastic IP address.”