AWS EC2 #
Amazon Web Services (AWS) is one of the leading cloud computing platforms, offering a wide range of services and tools for building, deploying, and managing applications. One of its core services is Elastic Compute Cloud (EC2), which provides resizable compute capacity in the cloud.
EC2 allows you to create and manage virtual servers, called instances, that can be customized to suit your needs. You can choose the operating system, hardware resources (CPU, memory, storage), and networking configuration for your instances. EC2 also provides features such as auto-scaling, load balancing, and integration with other AWS services, making it a powerful and flexible platform for running applications in the cloud.
This section will guide you through the process of creating an EC2 instance.
Step 1: Sign in to AWS #
- Go to the AWS Management Console.
- Sign in to your AWS account or create a new one.
Step 2: Access the EC2 Dashboard #
- In the AWS Management Console, search for “EC2” in the search bar or find it under the “Services” menu.
- Click on “EC2” to open the EC2 Dashboard.
Step 3: Launch a new instance #
- In the EC2 Dashboard, click on the “Instances” link in the left sidebar.
- Click the “Launch instance” button and give it a name.
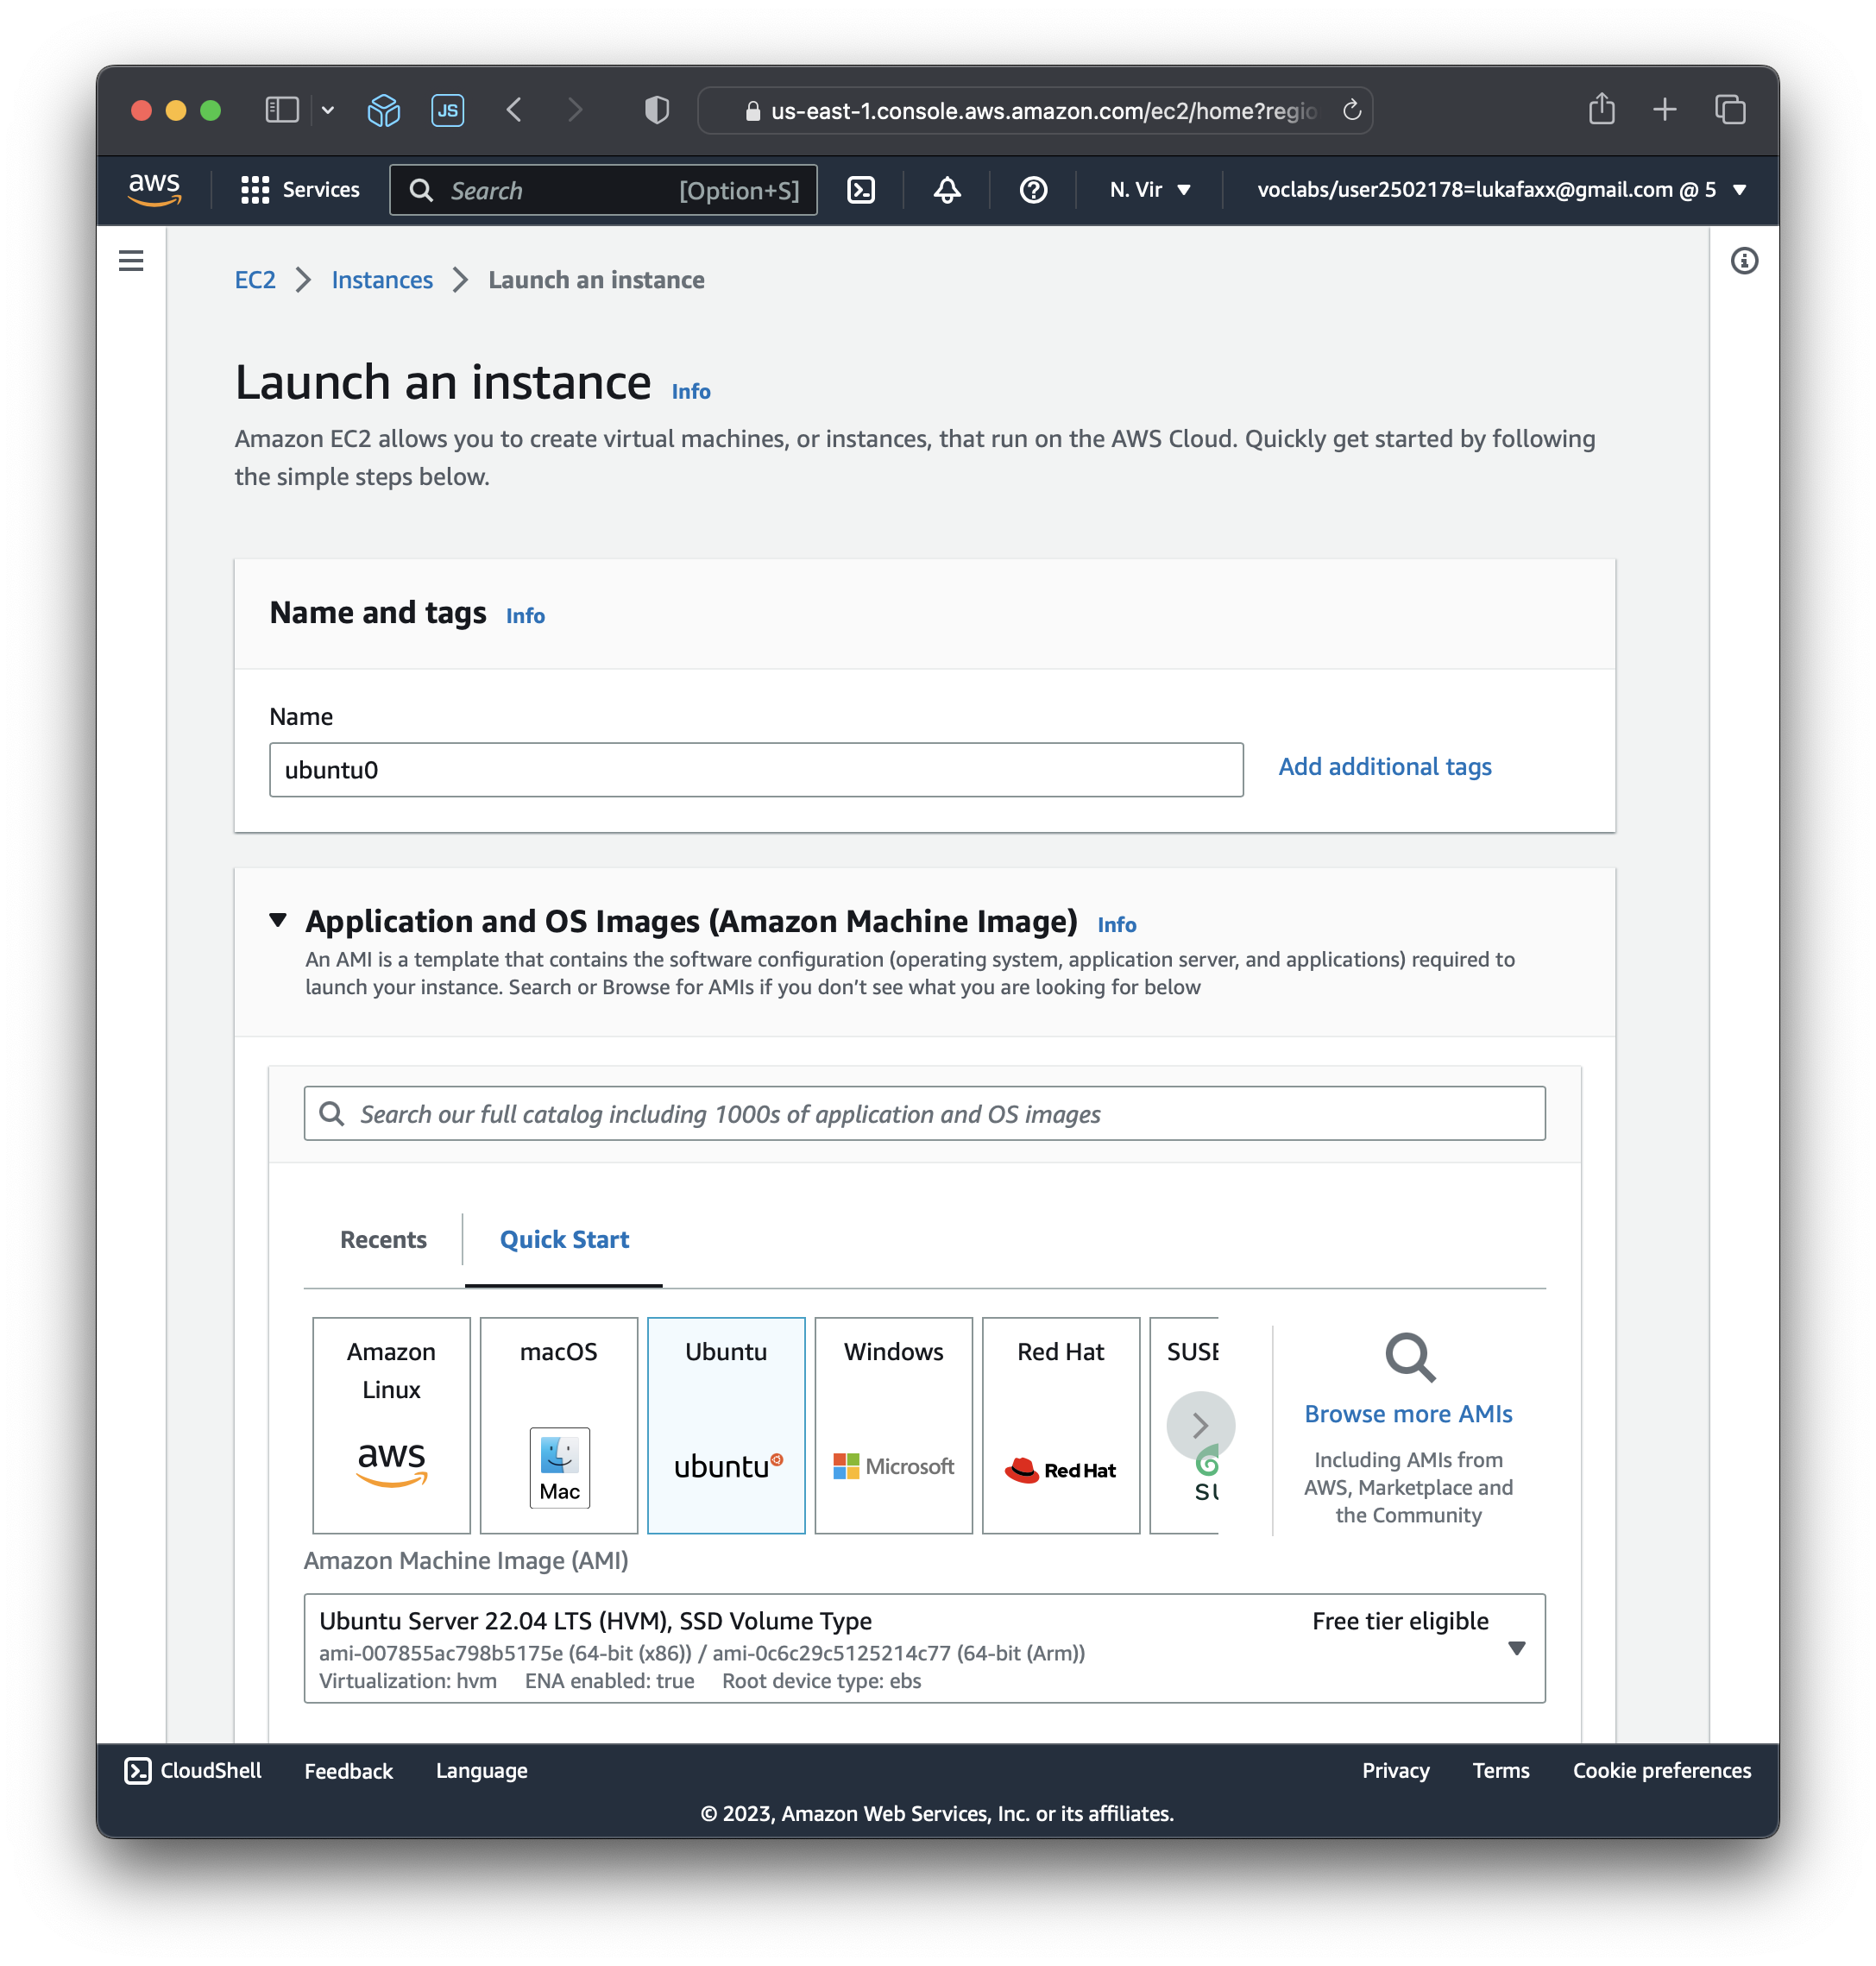
Step 4: Application and OS Images #
- Scrolling down, you’ll see a list of available Amazon Machine Images (AMIs). An AMI is a template that contains the operating system, software configuration, and other settings for your instance.
- Select the desired AMI for your instance. We will be using the Ubuntu Server AMI as it comes preconfigured with essential tools.
Step 5: Instance type #
- Next, you’ll be prompted to choose an instance type. This determines the hardware resources (CPU, memory, storage, etc.) allocated to your instance.
- For most beginners’ use cases, the default t2.micro which is part of the AWS Free Tier should suffice.
Step 6: Key pair #
You can refer to the upcoming SSH section now to get a better understanding of what those keys do.
- You can add key-value pairs to your instance to help you identify and manage it more easily. You should do it now.
- Click Create new key pair and enter a name (e.g. “aws”); you will be able to reuse it for different EC2 instances.
- Linux/Mac users should choose the
.pemformat. The.ppkformat is for Windows users who had to install PuTTY. - Save it to a secure location on your local machine, for example
~/.ssh/aws.pem, and runchmod 600 aws.pemon it to avoid an unprotected key file warning when you want to use it.
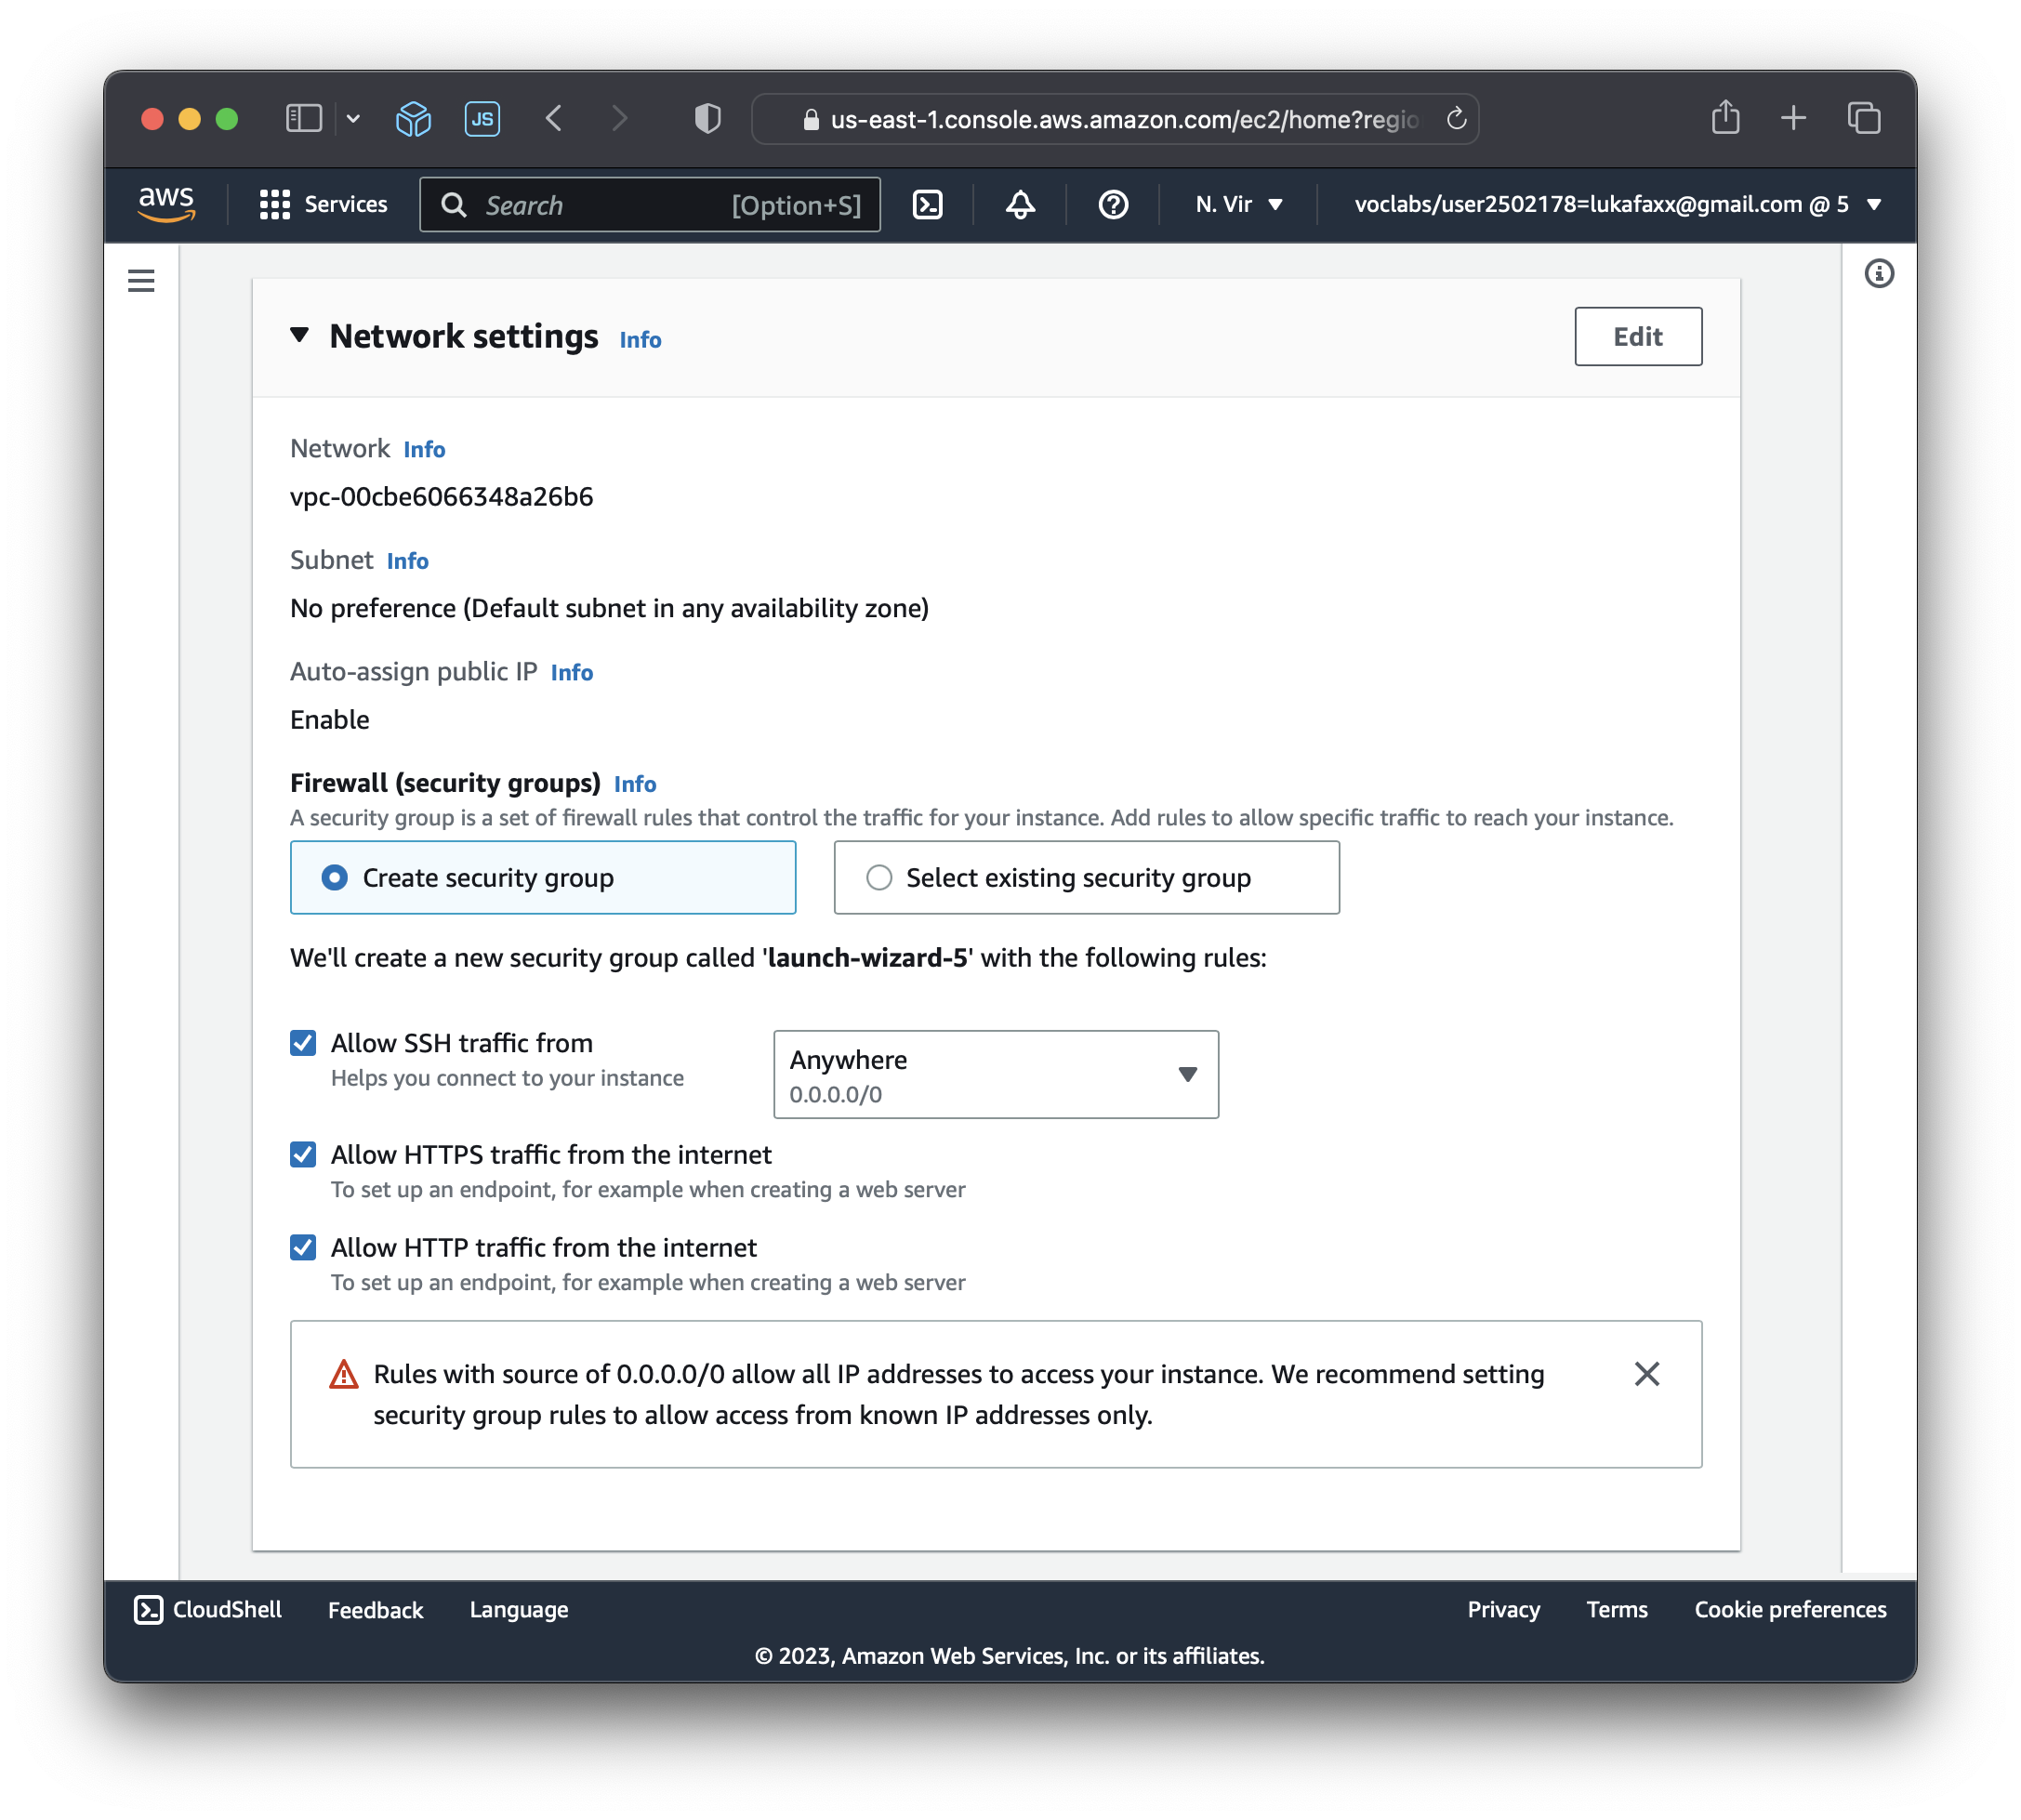
Step 7: Network Settings #
- You can create a new security group or select an existing one. A security group acts as a virtual firewall that controls the traffic for your instance.
- For most use cases, it is recommended to create a new security group with the default settings (allowing SSH traffic from anywhere). Because we know that we will deploy a website, you can also choose to open the HTTP/HTTPS ports.
Step 8: Review and launch #
Review your instance settings and click Launch when you’re ready. Your instance will now be created. It may take a few minutes for the instance to become available.
We will not access the instance yet as we need to setup a couple more things in the next section.